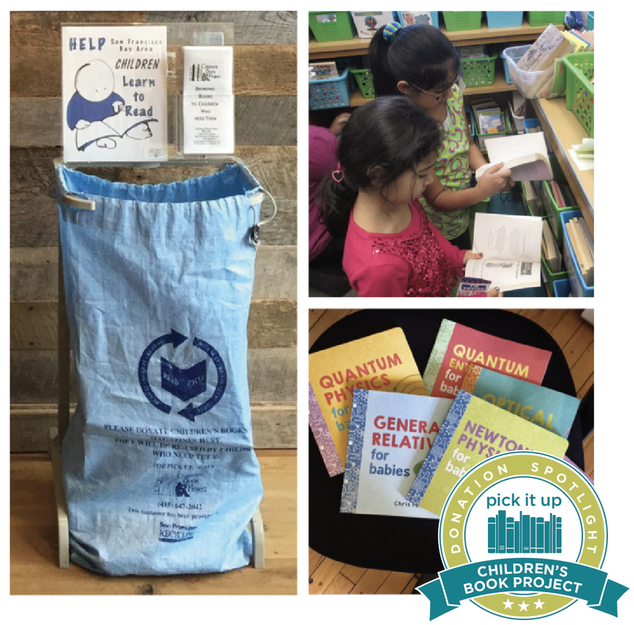
 The Children's Book Project is a wonderful San Francisco non-profit that is dedicated to providing free books to Bay Area children. Their website states:
"The Children’s Book Project was founded to help build literacy by providing new and gently used books for free to children who need them. Since 1992, we have given away over 2.7 million books for children in the San Francisco Bay Area and beyond. Research shows that children to whom books are read have an easier time learning to read than those who don’t have this experience. In addition, evidence shows that reading aloud to children actually helps their brain development. However, many children in the Bay Area and beyond live in homes without books and attend schools and programs where books are in short supply. Encouraging reading is not enough when families do not have books." The Children's Book Project is always in need of new or gently used, books for children of all ages, from infants through teens. Books can be donated on-site or at one of the many blue "Book Bags" at retailers around the city. Here is a list of all retailers with Book Bag donation sites. They especially need:
The Children's Book Project 1360 43rd Avenue, room 105 San Francisco 415.665.6315 childrensbookproject.org 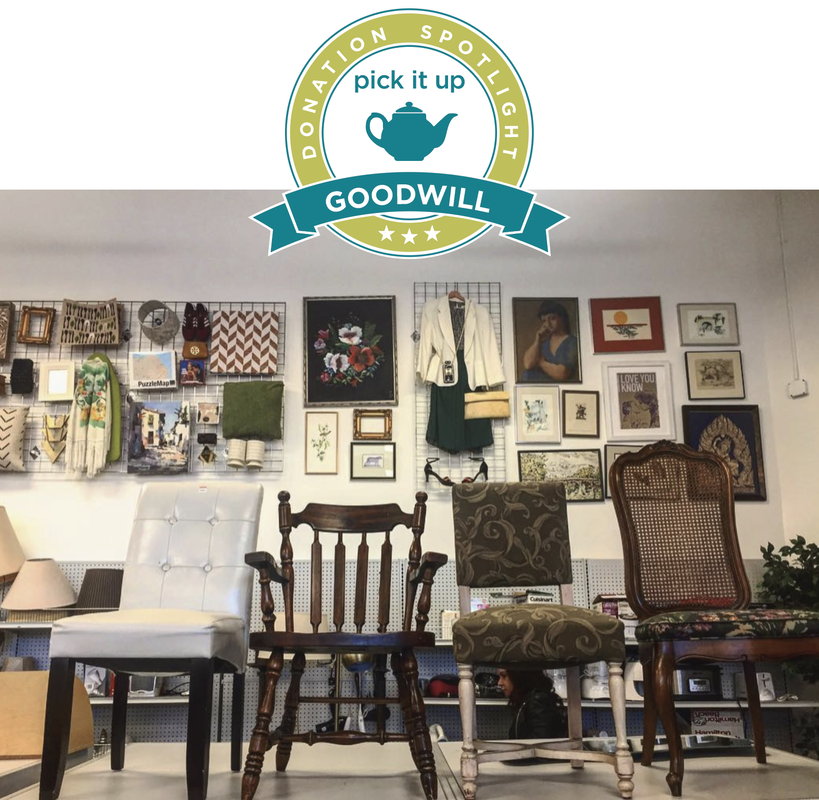 Donation Spotlight for November!
Goodwill sells goods to break the cycle of poverty for thousands of local people through free training and work placement programs. Goodwill has donation sites all over the bay area. Their website states: "Each year, nonprofit Goodwill of San Francisco, San Mateo, and Marin breaks the cycle of poverty for thousands of local people through our transformative free training and work placement programs. Goodwill serves anyone who comes through our doors with a willingness to work." Things they accept are:
My current favorite Goodwill donation location: 1690 Folsom Street San Francisco, CA 94103 Phone: 415-558-1760 Mon-Sat 9am-8pm • Sun 10am-7pm Donate at one of their 25 dropoff locations. sfgoodwill.org 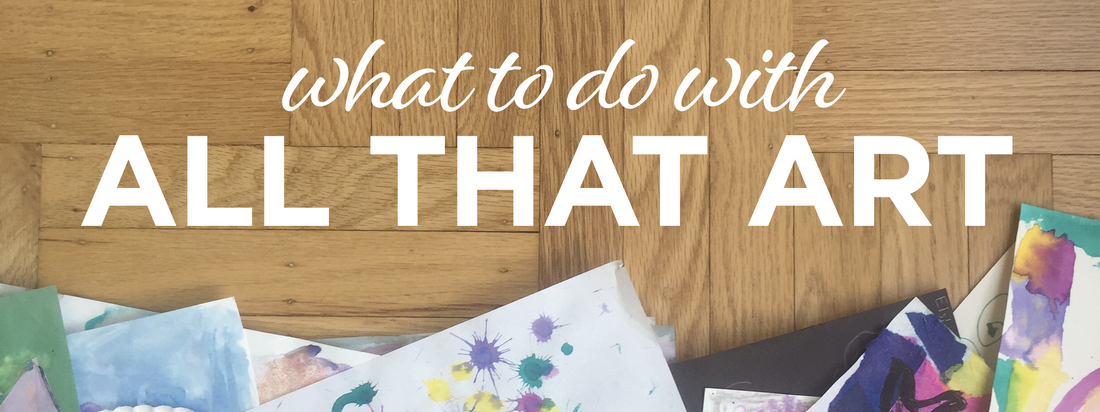 Pick It Up may receive a commission for purchases made through a referral link for Keepy at the end of this article. If you have kids, you know they love to create! From stick-figure family portraits to clay animals, they love to make, make, make. And you, of course, are the recipient of these amazing artistic gifts. But, you may ask, what do I do with all of these masterpieces? The artwork is covering the refrigerator, piled on their desk and pouring out of drawers. As this recent Atlantic Monthly article shows, it's definitely something parents struggle with! There is no single best way to handle all of your kids' art, but after trial and error, here are a few strategies I have developed to help parents to appreciate, honor, share, and maybe even let go of some of it.  Strategy 1: Show & Go This strategy focuses on making it easy to display, swap out and store your kid's art. First, create a temporary holder for the incoming artwork. I like using a woven storage bin or large document case for this purpose. Regularly purge through the pile, saving only the very best pieces. Next, set up a little gallery with some twine and clothespins. Swapping the art out is so easy that even the artist themselves can do it! Once an exhibition comes down, keep items for long-term storage in a handled portfolio labeled with each child's name. 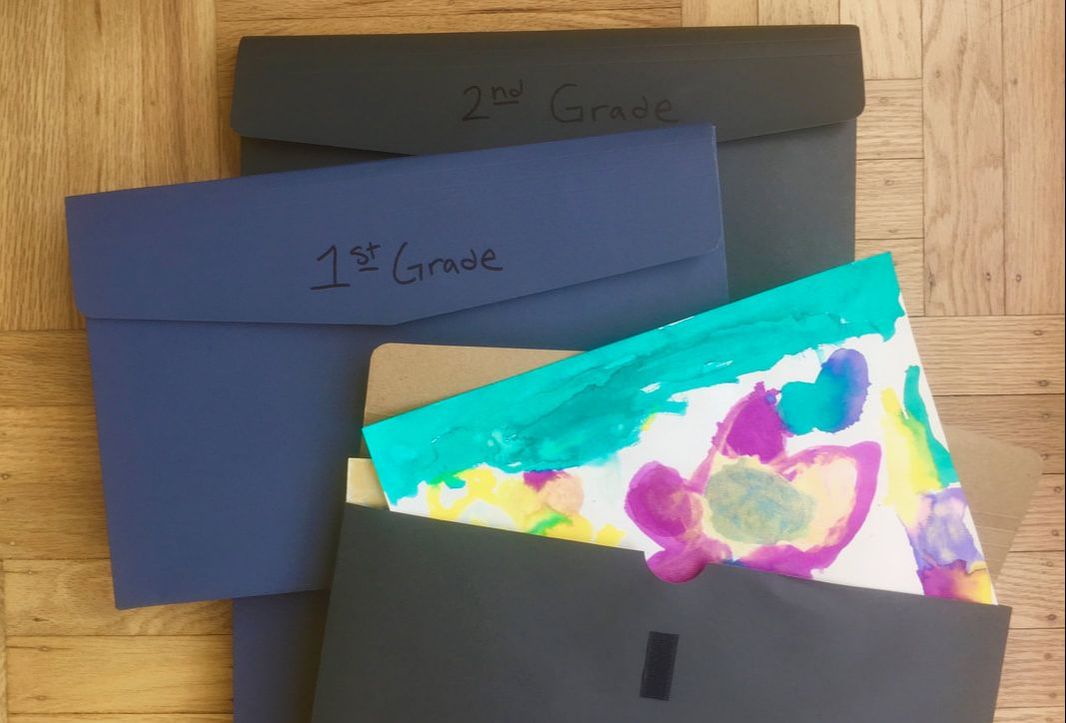 Strategy 2: Display & File This strategy is all about displaying and appreciating your kid's artwork. As with the first strategy, make a temporary storage area for the constant influx of art and regularly purge through the contents. Next, display the best pieces with style in Dynamic Frames. These look like traditional frames, but the glass front hinges open to make changing the artwork easy. At the end of the school year, whittle down the artwork to a manageable amount and permanently store it in a legal size expanding wallet labeled with the school year. 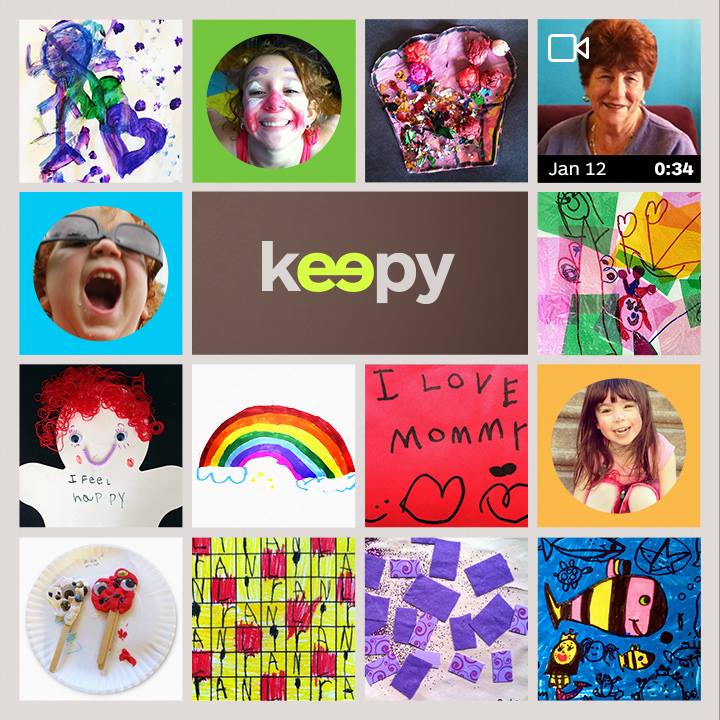 Strategy 3: Archive & Share This strategy is for those that love sharing and technology. As with the other strategies, make a temporary storage area for the constant influx of art and regularly purge through the contents. Next, snap photos of the best pieces and share them with an app like Keepy. Keepy makes it easy to digitally organize and save artwork, schoolwork, and mementos. Since it is a digital platform, you can easily share your kids' artwork, videos and audio clips with friends and family and they can share their thoughts back as well. Keepy is about more than archiving your kids' art, it's a community platform with so many fun uses. Keepy also makes it easy to print photo books of your kids' art. If you do, be sure to use the code PICKITUPSF20 at checkout to get 20% off! By using this referral code, Pick It Up does receive a commission. Of course, you can create your own individual strategy for managing your kids' artwork using any combination of the above ideas. The most important thing is to have a plan, or the art and school work can easily take over! If your little artist needs a dedicated studio space, take a look at my Kid Art Area Pinterest board for some ideas on making creative spaces. Alternately, feel free to book a session to help tackle the art spaces and artwork together! If you enjoyed this post check out Creative Spaces for Kids! 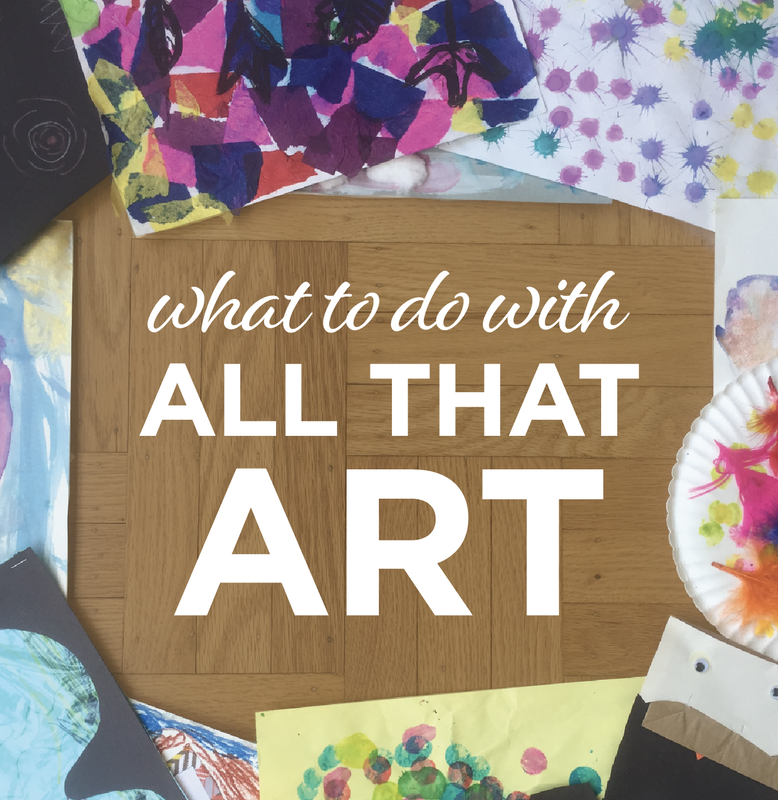 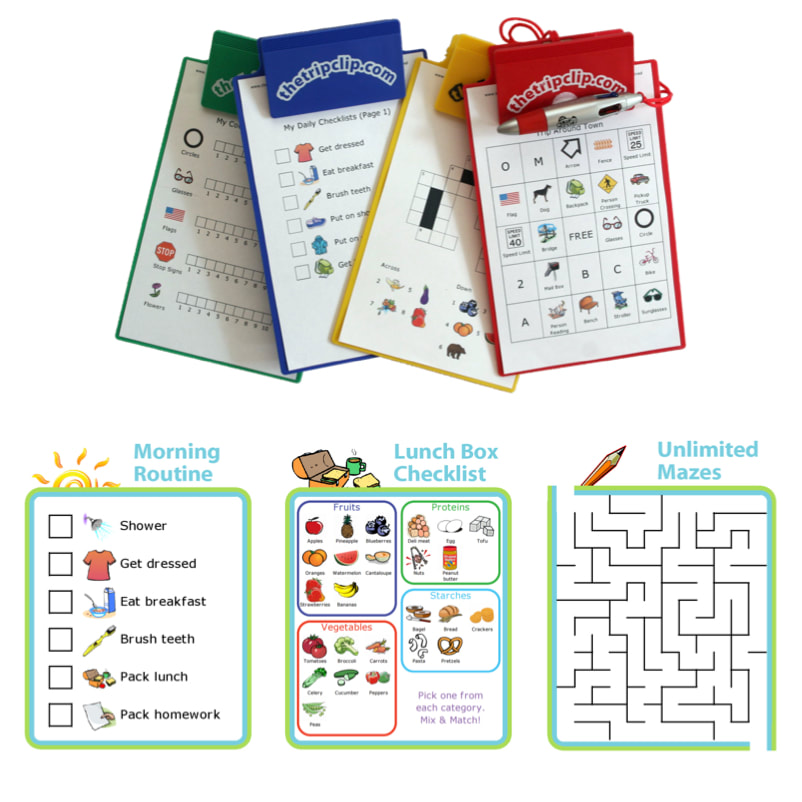 Now that we are back in the swing of school, many of us are helping our kids build healthy and independent routines. Recently, I discovered The Trip Clip. It's a website where you can design personalized charts, lists, and routines for your kids. When finished, the chart is saved as a PDF that you can print yourself. You can also go in and edit the chart as your child's routine changes. The Trip Clip offers morning, bedtime and after-school routines, lunch and packing lists, and chore charts, just to name a few. What's really cool is that you get to choose the icons and the wording for each list you create. The Trip Clip also has tons of printable activities for kids like coloring pages, mazes, math games, bingo, and crossword puzzles. There is a multitude of options for each game and activity. And, it's extremely reasonable as well, at $14.95 for access to all activities on the site. Print a bunch and be ready for that next road trip! The Trip Clip www.thetripclip.com If you enjoyed this post check out Organize Your way Back to School. I am thrilled that Pick It Up was named runner-up Best Organizer by San Francisco Magazine in the 2018 Best of San Francisco issue! Thanks SF Magazine! You can find a link to the Best of San Francisco 2018 issue here. 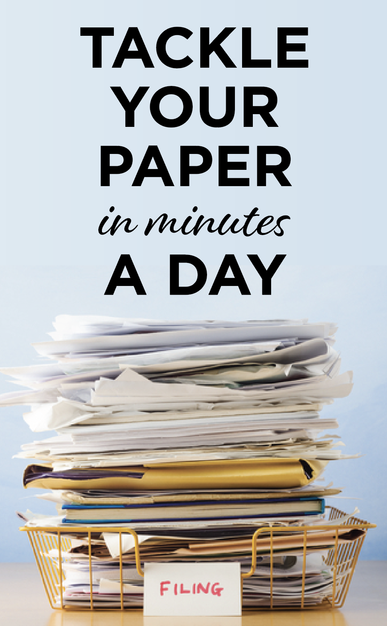 For many people, the constant onslaught of paper is a challenge that never seems to end. I often hear: "What should I do with this?" "I have a file cabinet, but I have no idea what's in there." "Do really I need this?" The answer, of course, depends on the paper and the person. I have found the trick to managing household papers is to have a system in place that reliably catches all that paper and helps you decide what do with each item. Think of this as your paper flow. In the Pick It Up Quick-Guide to Paper Flow (free download), I discuss the three steps to creating an effective paper flow. Papers should land in the same location each day. They should be processed with regularity, and a system is needed for both short and long-term retention. An area where many people get hung up is reference files. Most of us have a filing cabinet, but for many people, it is full of old files and is often in an inaccessible location. By following the below steps, you can bring your filing cabinet back to life! 1) PURGE. Dust off that cabinet and purge it like crazy! The older the files, the greater the chance they can be tossed or shredded. Ask yourself if you really need the papers for reference? Are these documents accessible online? Tax documents only need to be kept for seven years. Ask your CPA if you have any specific tax-related questions or check out the IRS retention guidelines. Always shred any documents with personal information like your social security number or account numbers. 2) STRUCTURE. Now that your file cabinet has been whittled down to current files, start giving it some structure. Do your remaining files fall into natural categories? Common categories would be Auto, Finances, Home and Health. Create a broad category and nest appropriate files under this heading. Here is an example: AUTO (the broad category) Auto Insurance DMV Registration Maintenance I find it is visually helpful to keep the broad category tab on the far left and the sub-folder tabs to the right. If you like to alphabetize, go for it! 3) MAINTAIN. Now that you have an easy-to-use filing system all you have to do is maintain it. Easier said than done, I know! File your papers right away, to avoid a huge pile of documents that need to be filed. Purge your filing cabinet a few times a year to keep it current. Filing may seem tedious, but with a little time and work, it can become a routine that helps keep your life running smoothly.  Dress for Success is a wonderful non-profit that empowers women to achieve economic independence by providing a network of support, professional attire and the development tools to help women thrive in work and in life. They have frequent drop-off events and one is coming up tomorrow in San Francisco (see details below.) If you have been looking for an excuse to clear out your closet, here it is! They accept women's professional interview clothing (including suits, blouses, pants, jackets, blazers, skirts, dresses, shoes, jewelry, scarves and handbags.) Items should be clean and not more than 5 years old. Upcoming drop off dates: Tuesday, February 6th 1-4pm Tuesday, February 20th 1-4pm Dress For Success Boutique 500 Sutter Street Suite #218 San Francisco, California 94102 415-362-0034 sanfrancisco.dressforsuccess.org 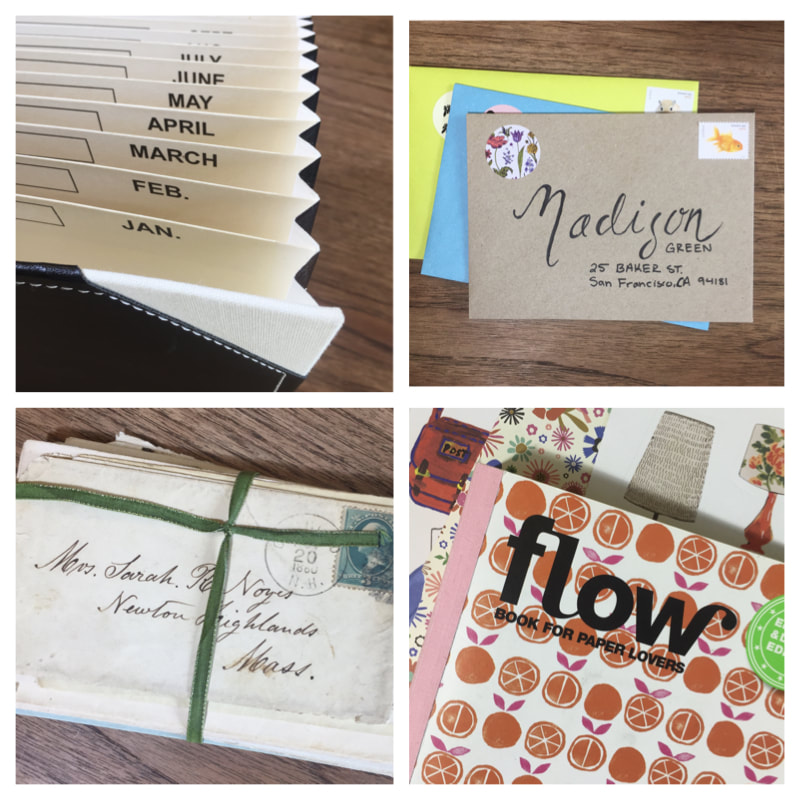 I never used to get birthday cards out on time. Truly. I had people's birthday's on my calendar, I had their address, I had birthday cards, I even had stamps on hand. Still, I never seemed to get the cards out in time. I am happy to say all that changed last year. Why? I started a birthday card tickler system. I know at this point you're thinking, "What the heck is a tickler system?" Admittedly it's a strange name, but it's just a reminder system that "tickles" your memory. It's also an easy way to get ahead on those pesky cards. With a few simple supplies and a little time, you can get all your birthday cards taken care of for the year! 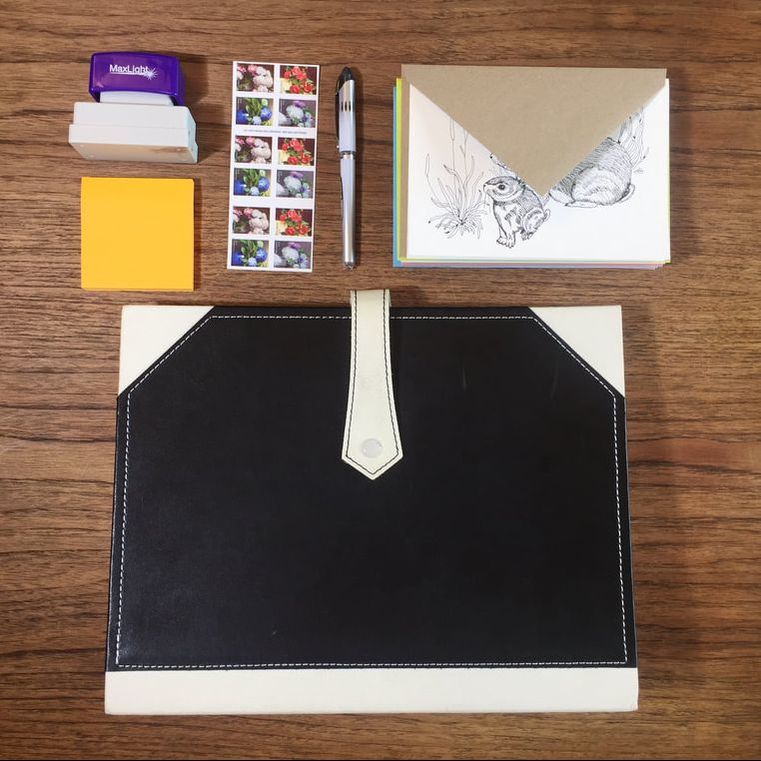 Supplies:
GATHER. Start by gathering the above supplies. Purchase as many birthday or occasion cards and stamps as you will need for the year. Don't go overboard! Keep your card list manageable. ADDRESS. Your tickler system starts with an expanding file folder with twelve pockets, labeled for each month of the year. Determine if anyone on your list has a January birthday. If so, choose a card for them, address it, stamp it and place the return address on it. I like to leave the inside of the card blank so I can write a personal note at the time that I am sending it, but that's up to you. If you are leaving the card interior blank for now, be sure not to seal the envelope!  FILE. Place a sticky note on the card with the actual birth date so you know if you should send it early or later in the month. Place it in the January pocket and move on. Do this for each person on your list. When one month is done, I find it helpful to arrange the cards in order of date before I place them in the file. If someone has a birthday in the first few days of the month, I place their card in the month prior, so I get it off to them on time. REVIEW & SEND. At the start of each month, open up the pocket for that month and see which cards need to be sent. If you left the interior of the card blank, now is a great time to write a heartfelt note in each. A week or so before the date, pop it in the mail and you're done! 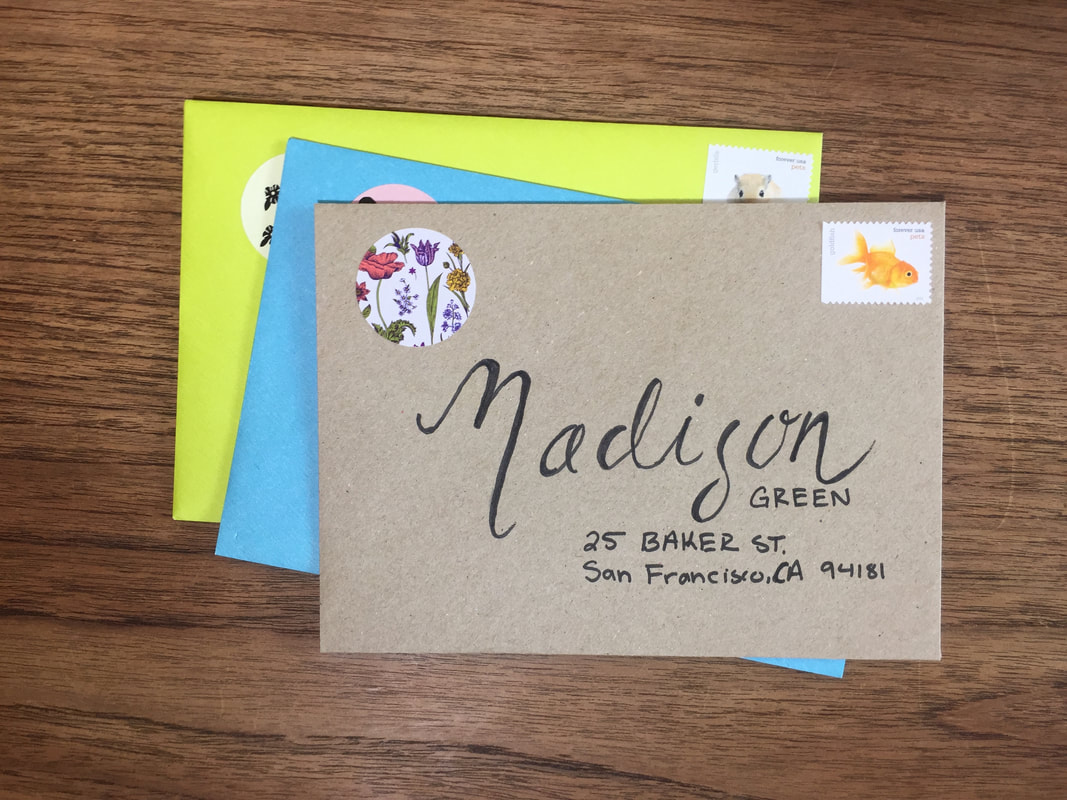 Now, if you want to stop there, congratulate yourself on a job well done! However, if you have a love of paper-arts or drawing you may want to embellish your letters. You could add some fun stickers to the envelopes. If you have a flair for brush script or calligraphy, you could make the name or address really special! Get inspired by the beautiful handwriting on 19th-century letters. If you love drawing, you could doodle on the envelope. If you love stamps, instead of putting one 50¢ stamp, place a curated collection of stamps that add up to 50¢ like my talented friend Jenny. I love getting her letters because they are so beautiful! 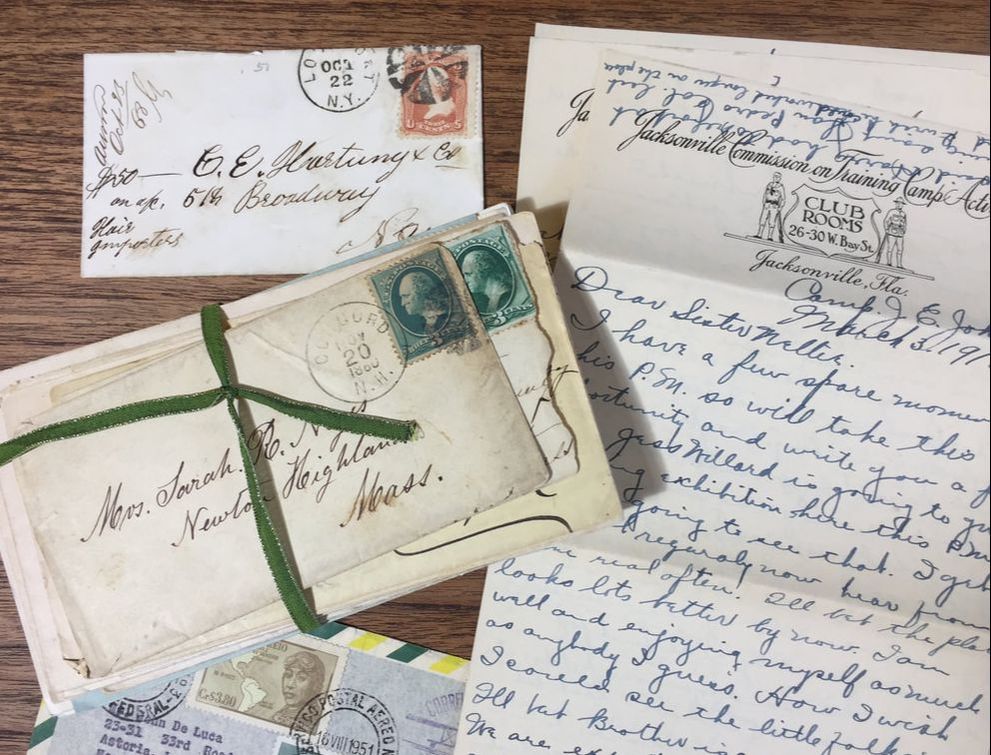 This whole project was inspired by a Dutch magazine called Flow. It comes out a few times a year and is full of gorgeous paper, fun pull-outs, stickers and lots of postcards. This magazine just makes you want to send beautiful letters! I love sending letters so much now that I include one or two a month in my tickler system just to say "hello" to people. Add your individual heart and creativity to these letters, knowing that they will go out into the world all year long and make people smile! 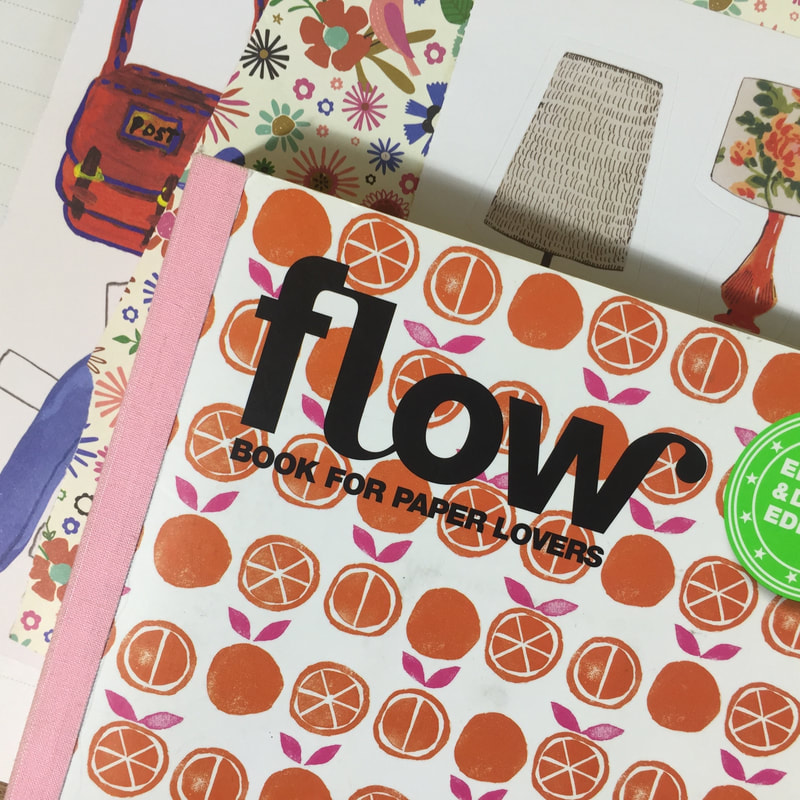 Sometimes we just need to be reminded of the basics! If you have an organizing project and don't know where to start, look no further than this quick guide! It's all about the basics. 1) SET ASIDE TIME: Block of 3 hours to start your project. Make this a time with no interruptions. No kids or phones! 2) START SMALL: Pick a room and choose a small area, such as your desktop or one drawer to start. 3) ASK QUESTIONS: For every object, as yourself, do you want it, love it, or need it? If the answer is "no" let it go! 4) CAN IT BE DONATED? Donate items that still have use! Check out my favorite donation organizations here. 5) HOW ABOUT RECYCLED? Can't donate it? Use the RecycleWhere tool to find recycling and responsible disposal options. 6) KEEP GOING: Stay focused on your chosen area and your work will pay off! If you need some extra help, feel free to book a session! 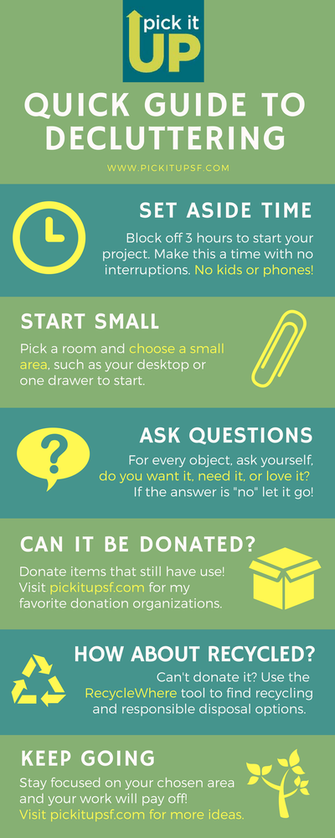 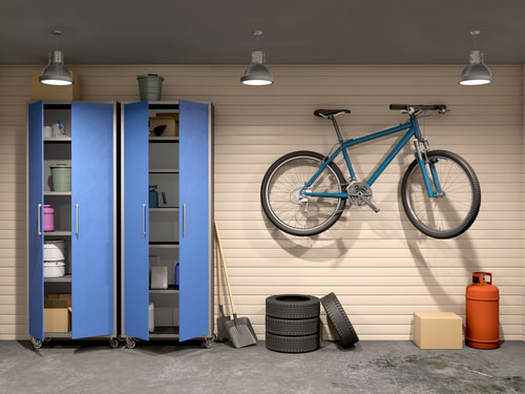 In San Francisco, our garages need to work hard. They may hold a collection of bikes, tools, toys, art supples and even a car! Too often, however, the garage is the ultimate dumping zone. Wouldn't it be nice to walk in your garage and love it? Imagine a place where it's easy to get around and find what you need. Is garage zen too much to ask for? I don't think so. It just takes some time and work. PLAN. Block off a section of time to start your project. I recommend 3-5 hours. Make this a time with no interruptions. No kids, phones or pets. You may not be finished at the end of this time, but you will have a good start. Keep at it and stay focused. SORT. Pick an area (such as the workbench) or a category (such as sports gear) and start asking yourself questions about the items you find. Is this item being used by you or someone else in the family? Is it needed? Does it work? Has it seen better days? Assess EVERY item you come across. DONATE. If the item is not needed or wanted, can it be donated? Not sure? Check out my list of local SF donation organizations. Place smaller items in grocery bags and put everything near the door. It's helpful to label the bag with the organization's name. If it's not something you can donate, recycle or responsibly dispose of it. Is it toxic? Call Recology to do a pickup at (415) 330-1405. ORGANIZE. If the item stays, find the right home for it, remembering to place it with like items. Not sure where it goes? Would bins, hooks or shelves be helpful? Put these items on a list and keep going. Stay focused on the task at hand. STORE. Once you have purged the area, additional storage is often needed. Should you hang the bikes? More shelving? You could go with a simple shelving unit from a home supply store, mounted shelving such as Elfa Utility, or an entire garage system such as Monkey Bars. Whichever way you go, purging and organizing must come first. For additional garage organizing ideas check out my garage Pinterest board. As always, feel free to book a session if you would like some help in creating your own garage zen! |

AuthorErin Becker is a 
Swimming in paper?
Download the free Quick-Guide to Paper Flow to start taming that pile! 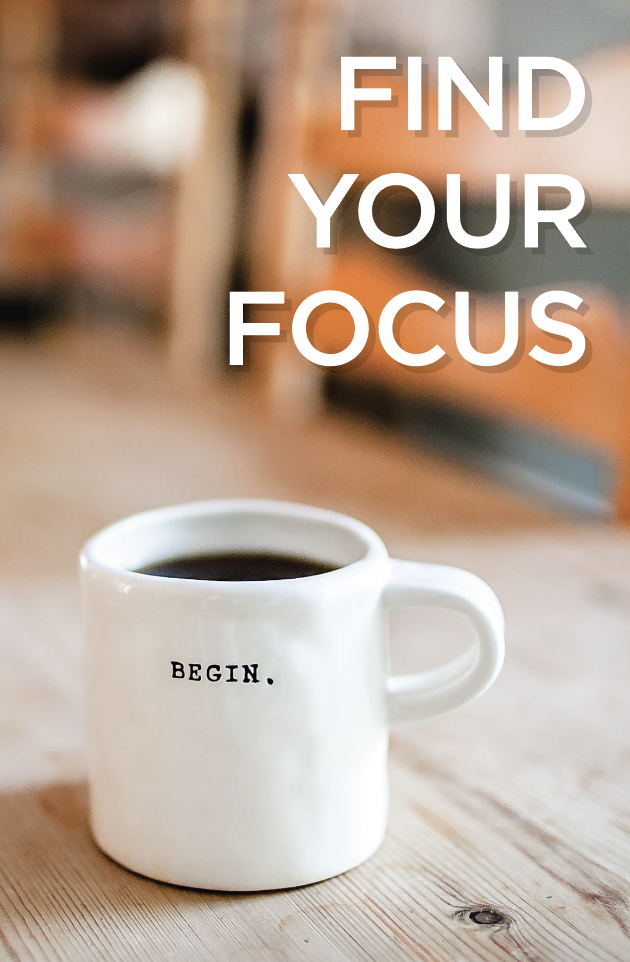
Having a hard time
getting things done? Subscribe to my new newsletter Find Your Focus! It’s full of useful and practical ways to bridge the gap between knowing and doing to help you reach your goals. Categories
All

|
Pick It Up, organizing and personal coaching • erin@pickitupsf.com
© 2023 Pick It Up, organizing and personal coaching
© 2023 Pick It Up, organizing and personal coaching